CSS Attribute Selectors: How and Why You Should Be Using Them
Today we’re going to learn about Attribute Selectors. What are they? How do I use them? What are the new CSS3 Attribute selectors? We’ll answer these questions and more.
The Ultimate Designer Toolkit: 2 Million+ Assets
Envato Elements gives you unlimited access to 2 million+ pro design resources, themes, templates, photos, graphics and more. Everything you'll ever need in your design resource toolkit.


HTML Attributes
Before I introduce you to the concept of CSS attribute selectors, you should know what an HTML attribute is. The good news is, you’re already familiar with several of them: class, id, style, and href for example. There are a ton more though, check out W3.org for a complete list.
CSS makes styling some attributes easy. For instance, if we want to style an id or class, we just use the following.
#someid {color: black}
.someclass {color: black}
This is all well and good, but what if we want to style some other attributes? This is where attribute selectors come into play.
Attribute Selectors
As we just learned, attribute selectors are exactly what they sound like, a way to select and target specific attributes using CSS. This is actually really easy to do and just involves a set of brackets containing the HTML that you used. Let’s see how this works by looking first at some basic HTML.
<ul>
    <li><a href="https://designshack.net/">Design Shack</a></li>
    <li><a href="http://www.smashingmagazine.com/">Smashing Magazine</a></li>
    <li><a href="http://sixrevisions.com/">Six Revisions</a></li>
</ul>
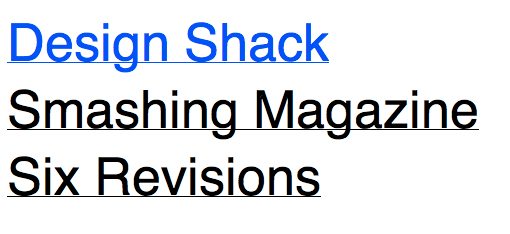
Let’s say I wanted to target and style only the Design Shack link. I could use pseudo selectors, but this assumes the list stays in that order and browser support isn’t the best. Instead, what we can do is use an attribute selector to target the specific “href” that we’re interested in.
a[href='https://designshack.net/'] {color: blue;}
Repeating Attributes
Another example that’s used a lot is a list of contacts, one or more of which should be styled a certain way. Using attributes, we can differentiate between friends and contacts.
<ul>
    <li><a href="#" rel="friend">Larry</a></li>
    <li><a href="#" rel="contact">Curly</a></li>
    <li><a href="#" rel="contact">Moe</a></li>
    <li><a href="#" rel="contact">Curly Joe</a></li>
    <li><a href="#" rel="friend">Shemp</a></li>
</ul>
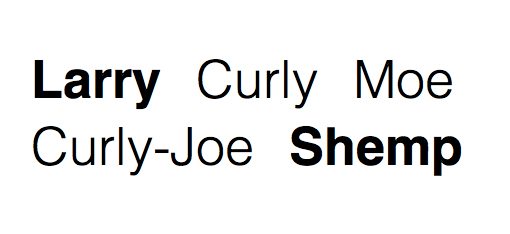
We can then go in and style each of these rel attributes differently using the same syntax as above. Much like with a class, multiple items can meet the criteria in one declaration.
li a[rel='friend'] {font-weight: bold;}
li a[rel='contact'] {font-weight: 200;}
Using this code we can achieve the results below. Notice that even if we start adding in new contacts to the top of the list, these selectors will still work where :nth-child wouldn’t. Pretty cool right? Further, just about every current browser supports these, including IE back to version 7!
It’s also important to note that you don’t have to be so specific. The following will style any element with a rel attribute applied.
li a[rel] {font-weight: bold;}
Handling Multiples Values
The tricky part about using Attribute selectors is that they get a little funny when there is multiple attributes. Consider the following tweak to our previous list.
<ul>
    <li><a href="#" rel="friend nofollow">Larry</a></li>
    <li><a href="#" rel="contact">Curly</a></li>
    <li><a href="#" rel="contact">Moe</a></li>
</ul>
You would think that styling the first list item would be the same process considering it still has “friend” in it, but that’s not the case. Simply using =’friend’ won’t successfully target this anymore. Instead, we have to use the following, which looks for “friend” as one of the rel values.
li a[rel~='friend'] {font-weight: bold;}
This will result in the “Larry” list item being bolded where as the previous a[rel=’friend’] syntax would’ve missed it.
CSS3 Attribute Selectors
CSS3 has given us so many cool new toys and tools to play with. It’s no surprise then that there are also some new Attribute Selectors that help us bring even more specificity into our targeting. Let’s start with my favorite.
Styling Similarly Named Attributes
This is where things get awesome. Let’s say you had the following HTML and that you wanted to target only the upperSection and lowerSection, how would you do it?
<div id="upperSection">
    <p>Lorem ipsum dolor sit amet...</p>
</div>

<div id="somethingElse">
    <p>Lorem ipsum dolor sit amet...</p>
</div>

<div id="lowerSection">
    <p>Lorem ipsum dolor sit amet...</p>
</div>

<div id="footer">
    <p>Lorem ipsum dolor sit amet...</p>
</div>
One easy answer is the new “Arbitrary Substring Attribute Value Selector”, or “the really cool little asterisk thing.” Since the two divs that we want to target both contain “Section” in their names, we can easily target them.
div[id*='Section'] {color: red;}
I was blown away by this. Here we’re using CSS to actually dig through our ID names to find specific values within a larger name and target those elements. This opens up a lot of possibilities and makes complex targeting with little markup a much easier task.
Beginning and Ending
While the Arbitrary Substring Attribute Value Selector will target a given string anywhere, the Beginning and Ending versions allow rarer cases to be handled where you only want the first or last item to be considered.
<ul>
    <li><a href="#" title="stooge one">Larry</a></li>
    <li><a href="#" title="the second stooge">Curly</a></li>
    <li><a href="#" title="stooge three">Moe</a></li>
    <li><a href="#" title="impostor">Curly-Joe</a></li>
</ul>
Let’s say we want to target all the stooges, making Larry and Moe red and Curly yellow. To do this, we can insert use [title^=’stooge’] to grab all those with “stooge” as the first word and [title$=’stooge’] to grab all those with “stooge” as the last word.
li a[title^='stooge'] {color: red} /*Beginning*/
li a[title$='stooge'] {color: yellow} /*Ending*/
Chaining Attribute Selectors
Let’s say you want to get super specific and add on multiple criteria. That’s as simple as chaining together multiple attribute selectors. Let’s see how this works with the HTML below.
<ul>
    <li><a href="#" title="stooge one">Larry</a></li>
    <li><a href="#" title="the second stooge">Curly</a></li>
    <li><a href="#" title="stooge three">Moe</a></li>
    <li><a href="#" title="the impostor">Curly-Joe</a></li>
</ul>
Now, let’s target any link with “stooge” in the title, but only those beginning with “the”. Notice that we don’t want to casually target “the” because this also appears in the last item. Here’s the syntax for achieving this:
li a[title*='stooge'][title^='the'] {color: red;}
Simple right? All we did was take the two rules that we needed and put them on the same line. It’s important to note that this isn’t an either/or scenario but a both/and. Only those items that meet both criteria will be changed.
Further Reading
If you’re enough of a nerd that you’re just loving attribute selectors, there are two more sources that I highly recommend that you check out.
CSS Tricks
First, Chris Coyier has a very thorough introduction over at CSS Tricks covering much of the same content that we covered here. Chris is a CSS super genius though and likely explains them much better than me!
The Book of CSS3
Next, check out Peter Gasston’s The Book of CSS3, which has been my main reference for all things CSS3 lately. I simply can’t get enough of this book and have given it quite the permanent position on my desk! Gasston adds to this conversation with a discussion of General and Adjacent Sibling Combinators, which are another interesting way to target certain elements. Take the following HTML as an example:
<div id="combinators">
    <p>Not this one.</p>
    <h1>Gibberish</h1>
    <p>Pick me!</p>
    <p>Lorem ipsum dolor sit amet...</p>
    <p>Lorem ipsum dolor sit amet...</p>
    <p>Lorem ipsum dolor sit amet...</p>
</div>
Now, let’s say we wanted to target only the “Pick me!” paragraph. The Adjacent Sibling Combinator let’s us do just that. The following code targets any p tags immediately preceded by an h1 tag. There is only one of these in the example above (the first paragraph after the header).
h1 + p {color: orange;}
Similarly, the General Sibling Combinator will allow us to target all of the p tags that come after the header. So that first paragraph won’t change color, but all of the others will.
h1 ~ p {color: orange;}
This is just a taste, for more information on these, check out The Book of CSS3.
Browser Support
As I mentioned briefly above, as far as I can tell, you’re pretty covered on most of these techniques back to IE7 with all major current browsers rocking perfect support. However, it’s not exactly a full score across the board with some of the lesser-known browsers being a little spotty. You can find a nice little table of browsers and their support for all of this stuff and more at dev.l-c-n.com.
Conclusion
To be honest, I very recently knew little to nothing about CSS attribute selectors. After a little bit of research though I was stunned by how cool they are and baffled as to why they seem to be so rare (browser support is better than for a lot of the stuff we mess with). With just a little bit of code, you can achieve remarkably specific targeting with little to no additional markup required.
Leave a comment and let me know what you think of attribute selectors and whether or not you ever use them!