Using eCSStender to Clean Up Your CSS
Recently we looked at how to use LESS.js to enhance your CSS and save you tons of development time. Today we’ll look at eCSStender, another JavaScript tool that enables you to implement complicated CSS3 properties with very little code.
eCSStender can be a bit confusing to figure out on your own but once you figure it all out it will literally take you less than a minute to install and use. Below I’ll walk you through building a basic example that uses a number of eCSStender extensions.
2 Million+ Digital Assets, With Unlimited Downloads
Get unlimited downloads of 2 million+ design resources, themes, templates, photos, graphics and more. Envato Elements starts at $16 per month, and is the best creative subscription we've ever seen.


What Is eCSStender?
The basic workflow of eCSStender is as follows: find and download an extension, throw it in your website directory, link to it in your HTML, implement the CSS.
The major benefits of eCSStender were discussed in detail in Aaron Gustafson’s recent article, Stop Forking with CSS3 (Aaron Gustafson is the creator of eCSStender). One of the biggest problems with CSS3 is of course the lengthy code necessary to implement it in a cross-browser manner.
For instance, if we have a simple box that we want to give rounded corners and a drop shadow, the following code is necessary:
.myBox {
  -moz-border-radius: 12px; /* FF1+ */
  -webkit-border-radius: 12px; /* Saf3-4 */
  border-radius: 12px; /* Opera 10.5, IE 9, Saf5, Chrome */
  -moz-box-shadow: 0px 0px 4px #ffffff; /* FF3.5+ */
  -webkit-box-shadow: 0px 0px 4px #ffffff; /* Saf3.0+, Chrome */
  box-shadow: 0px 0px 4px #ffffff; /* Opera 10.5, IE 9.0 */
}
We’re essentially only adding two styles, yet it takes six lines of code! eCSStender reduces the work necessary here by allowing you to type a single line of code that automatically executes all of the recommended style versions.
To see how this works, let’s build a basic example.
The Box
To keep things ridiculously simple, let’s just build a web page with a square and some text.
The markup here is super basic. Here’s the HTML:
<!DOCTYPE html PUBLIC "-//W3C//DTD XHTML 1.0 Strict//EN"
       "http://www.w3.org/TR/xhtml1/DTD/xhtml1-strict.dtd">

<html xmlns="http://www.w3.org/1999/xhtml" xml:lang="en" lang="en">

<head>
       <meta http-equiv="Content-Type" content="text/html; charset=utf-8"/>
       <title>sCSStender Test</title>
       <link rel="stylesheet" href="style.css" type="text/css" media="screen" charset="utf-8"/>
</head>

<body>
	<div id="theBox">
		<p><a href="#">eCSStender</a></p>
	</div>
</body>

</html>
And here’s the CSS at this point:
* {
	padding: 0;
	margin: 0;
}

body {
	background: #83d9c5;
}

#theBox {
	font-family: helvetica, sans-serif;
	font-size: 50px;
	line-height: 300px;
	text-align: center;
	letter-spacing: -2px;

}

#theBox a {
	display: block;
	width: 300px;
	height: 300px;
	background-color: #123a31;
	text-decoration: none;
	color: white;
	margin: 100px auto;
}

#theBox a:hover {
	background: #1e6152;
}
Downloading eCSStender
To make our boring box more exciting, we’ll first need to download eCSStender. What you get in this download is a big mess of files that will leave you confused and intimidated.
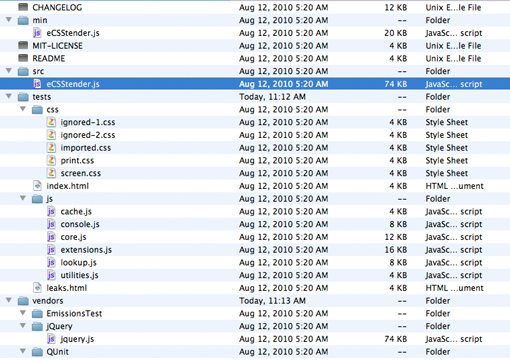
Fortunately, you only need to worry about a single file here. Just grab “eCSStender.js” from the “src” folder and toss the rest. Advanced users should feel free to dig through all of the examples and documentation but for the purposes of this tutorial the main JavaScript file will do just fine all by itself.
Downloading Extensions
eCSStender doesn’t do much right out of the box. Instead, you create and/or download free extensions to complement your needs. Head over to the eCSStender Extensions page to see what’s available.
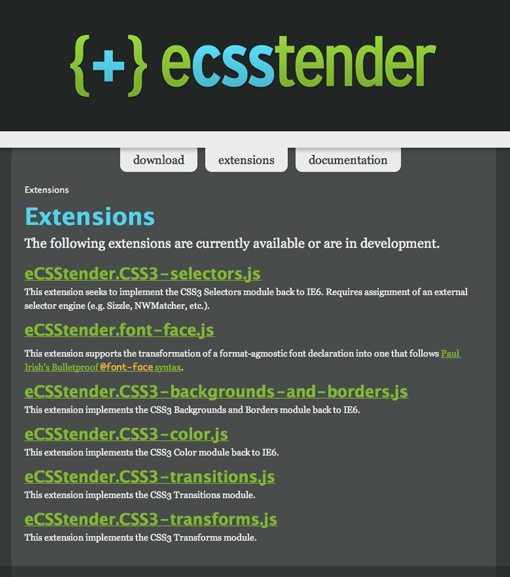
As you can see, eCSStender is still in the early stages of development so there is only a handful of extensions at the moment, some of which are still under construction.
When you click on one of the links shown above you’ll be taken to a page where you can download the extension, see a demo, and learn about its implementation.
Our First Test: Rounded Corners
To see how this all works, download the backgrounds and borders extension. Here again you are going to get a pretty hefty download just to nab a single file. Grab the file named “eCSStender.css3-backgrounds-and-borders.js” and toss it in your website directory.
Linking the Files
Now that we have both eCSStender and an extension installed, it’s time to load them into your HTML document. This is done exactly like any other .js file, just throw in a link in the head portion of your document.
<script type="text/javascript" src="eCSStender.js"></script>
<script type="text/javascript" src="eCSStenderBB.js"></script>
As you can see, I decided that the filename for the backgrounds and borders extension was way too long and renamed it “eCSStenderBB.js” to keep things simple. Feel free to ignore this step if you like, just make sure your filenames match that shown in your HTML.
The CSS
As you can see, there really hasn’t been much work thus far. Most of the content above is explanation, background, etc. All we’ve really done up to this point is download a file and link it in our HTML, very much like you’d do with jQuery.
When you implement a given extension in the CSS of your site, be sure to consult the download page for proper syntax. In our case, the following code gets the job done:
border-radius: 25px 50px 75px 100px;
That’s all there is to it. eCSStender will do its magic and make sure that this code is appropriately transformed to work in most modern browsers.
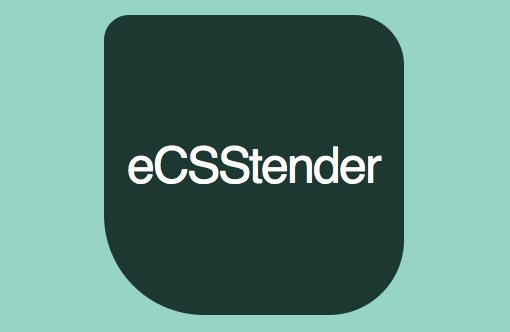
Now, you’ll notice that this gave us a pretty funky shape. That’s because each corner is set to a different radius. I do sort of like the basic idea here though so I’m going to reset that so that one corner is fairly sharp and the others are uniformly rounded to a greater degree.
border-radius: 25px 75px 75px 75px;
Adding More
Just to make sure you get the gist, let’s add two more properties. First, download both the transition and transform extensions.
Grab the necessary .js files just as with the previous example and toss them into your site folder. From each extension’s download page we can see that the syntax is as follows:
transition: all 1s ease-in-out;
transform-origin: 0 0;
transform: rotate(-15deg)
As you can see, the transition syntax is fairly basic: select what to transition, set a duration, and set an ease. With the transform property you have to first set an origin, then list the transform you want to take place along with a numerical indicator. In this case we rotated the object 15 degrees.
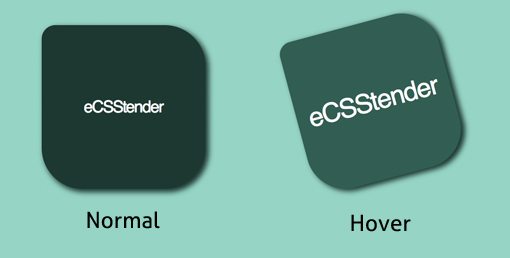
So to apply this to our example, let’s make a fun hover effect.
#theBox {
	font-family: helvetica, sans-serif;
	font-size: 30px;
	line-height: 300px;
	text-align: center;
	letter-spacing: -2px;
}

#theBox a {
	display: block;
	width: 300px;
	height: 300px;
	background-color: #123a31;
	text-decoration: none;
	color: white;
	margin: 100px auto;
	border-radius: 25px 75px 75px 75px;
	box-shadow: 5px 5px 15px 1px #123a31;
	transition: all 1s ease-in-out;
}

#theBox a:hover {
	background: #1e6152;
	font-size: 50px;
	transform-origin: 0 0;
	transform: rotate(-15deg);
}
So now when you hover over the box, it will rotate, change color, and change font-size all with a nice transition.
Each one of these CSS3 properties would’ve normally taken around four lines of code. So as you can see, we’ve definitely saved ourselves quite a bit of coding.
eCSStender vs. LESS: What’s the Verdict?
Overall eCSSstender was definitely fun to play with. However, because I’ve been toying around with a lot of these CSS tools lately, I simply can’t help but compare them all to LESS.
Let’s take a look a few of the areas where each system excels. Out of the box, LESS feels more powerful because it turns CSS into a real programming language with variables, operations etc. This adds a certain flexibility to the coding and syntax that you don’t get with eCSStender. LESS also doesn’t require users to hunt down and download multiple extensions and link to a plethora of JS docs. Finally, LESS can be used immediately by anyone without concern for compatibility because what is ultimately uploaded is plain old CSS.
eCSStender makes it easy for developers to create custom plugins so in the long term, this might actually be the more powerful and robust solution (as long as developers jump on board). eCSStender is also nice because you can skip the compiling step inherent in the LESS method (.LESS files are compiled to .CSS files). There are also a few more technical reasons you might like eCSStender better found under the FAQ section. For instance, “a pre-processor [like LESS] can’t leverage that nuance to implement JavaScript-based animations as an alternative to CSS-based ones if they aren’t supported the because pre-processors (as they are currently built) take a “one size fits all” approach to handling CSS: everyone gets the same thing.”
However, despite all this, even the eCSStender website admits that it’s simply not all that practical to use in many circumstances. For my own part, I can’t see myself ever really using eCSStender for more than a little fun and experimentation (unless some big changes are made).
For whatever reason, eCSStender just took a lot more “fiddling” than LESS to get everything working properly. For instance, I’d get eCSStender up and running on Safari, but then it wouldn’t work in Chrome (bizarre since they’re both Webkit) and would frequently crash Firefox.
Ultimately, tools like these are intended to improve and simplify your workflow. Give them a shot for yourself to see if that intention actually plays out. If SASS, LESS, eCSStender, or any other similar tools result in actually adding time to your coding process, then toss them and revert back to good old HTML and CSS the way they were intended to be.
Join the Conversation
Leave a comment below and let us know which CSS extending or modifying tools you’ve tried. Tell us what you think of LESS and eCSStender. Do you like one and hate the other, love them both, or can’t see a reason for either to exist?
As developers in the real world, you ultimately decide what gets adopted and what doesn’t and we want to hear your opinions!